Setting up Microsoft Entra
Overview
Section titled “Overview”This guide walks you through configuring Microsoft Entra ID (formerly Azure Active Directory) as your identity provider for DeepIntShield Enterprise. After completing this setup, your users will be able to sign in to DeepIntShield using their Microsoft credentials, with roles and team memberships automatically synchronized.
Prerequisites
Section titled “Prerequisites”- A Microsoft Azure account with access to Entra ID (Azure AD)
- Admin access to create app registrations
- DeepIntShield Enterprise deployed and accessible
- The redirect URI for your DeepIntShield instance (e.g.,
https://your-deepintshield-domain.com/login)
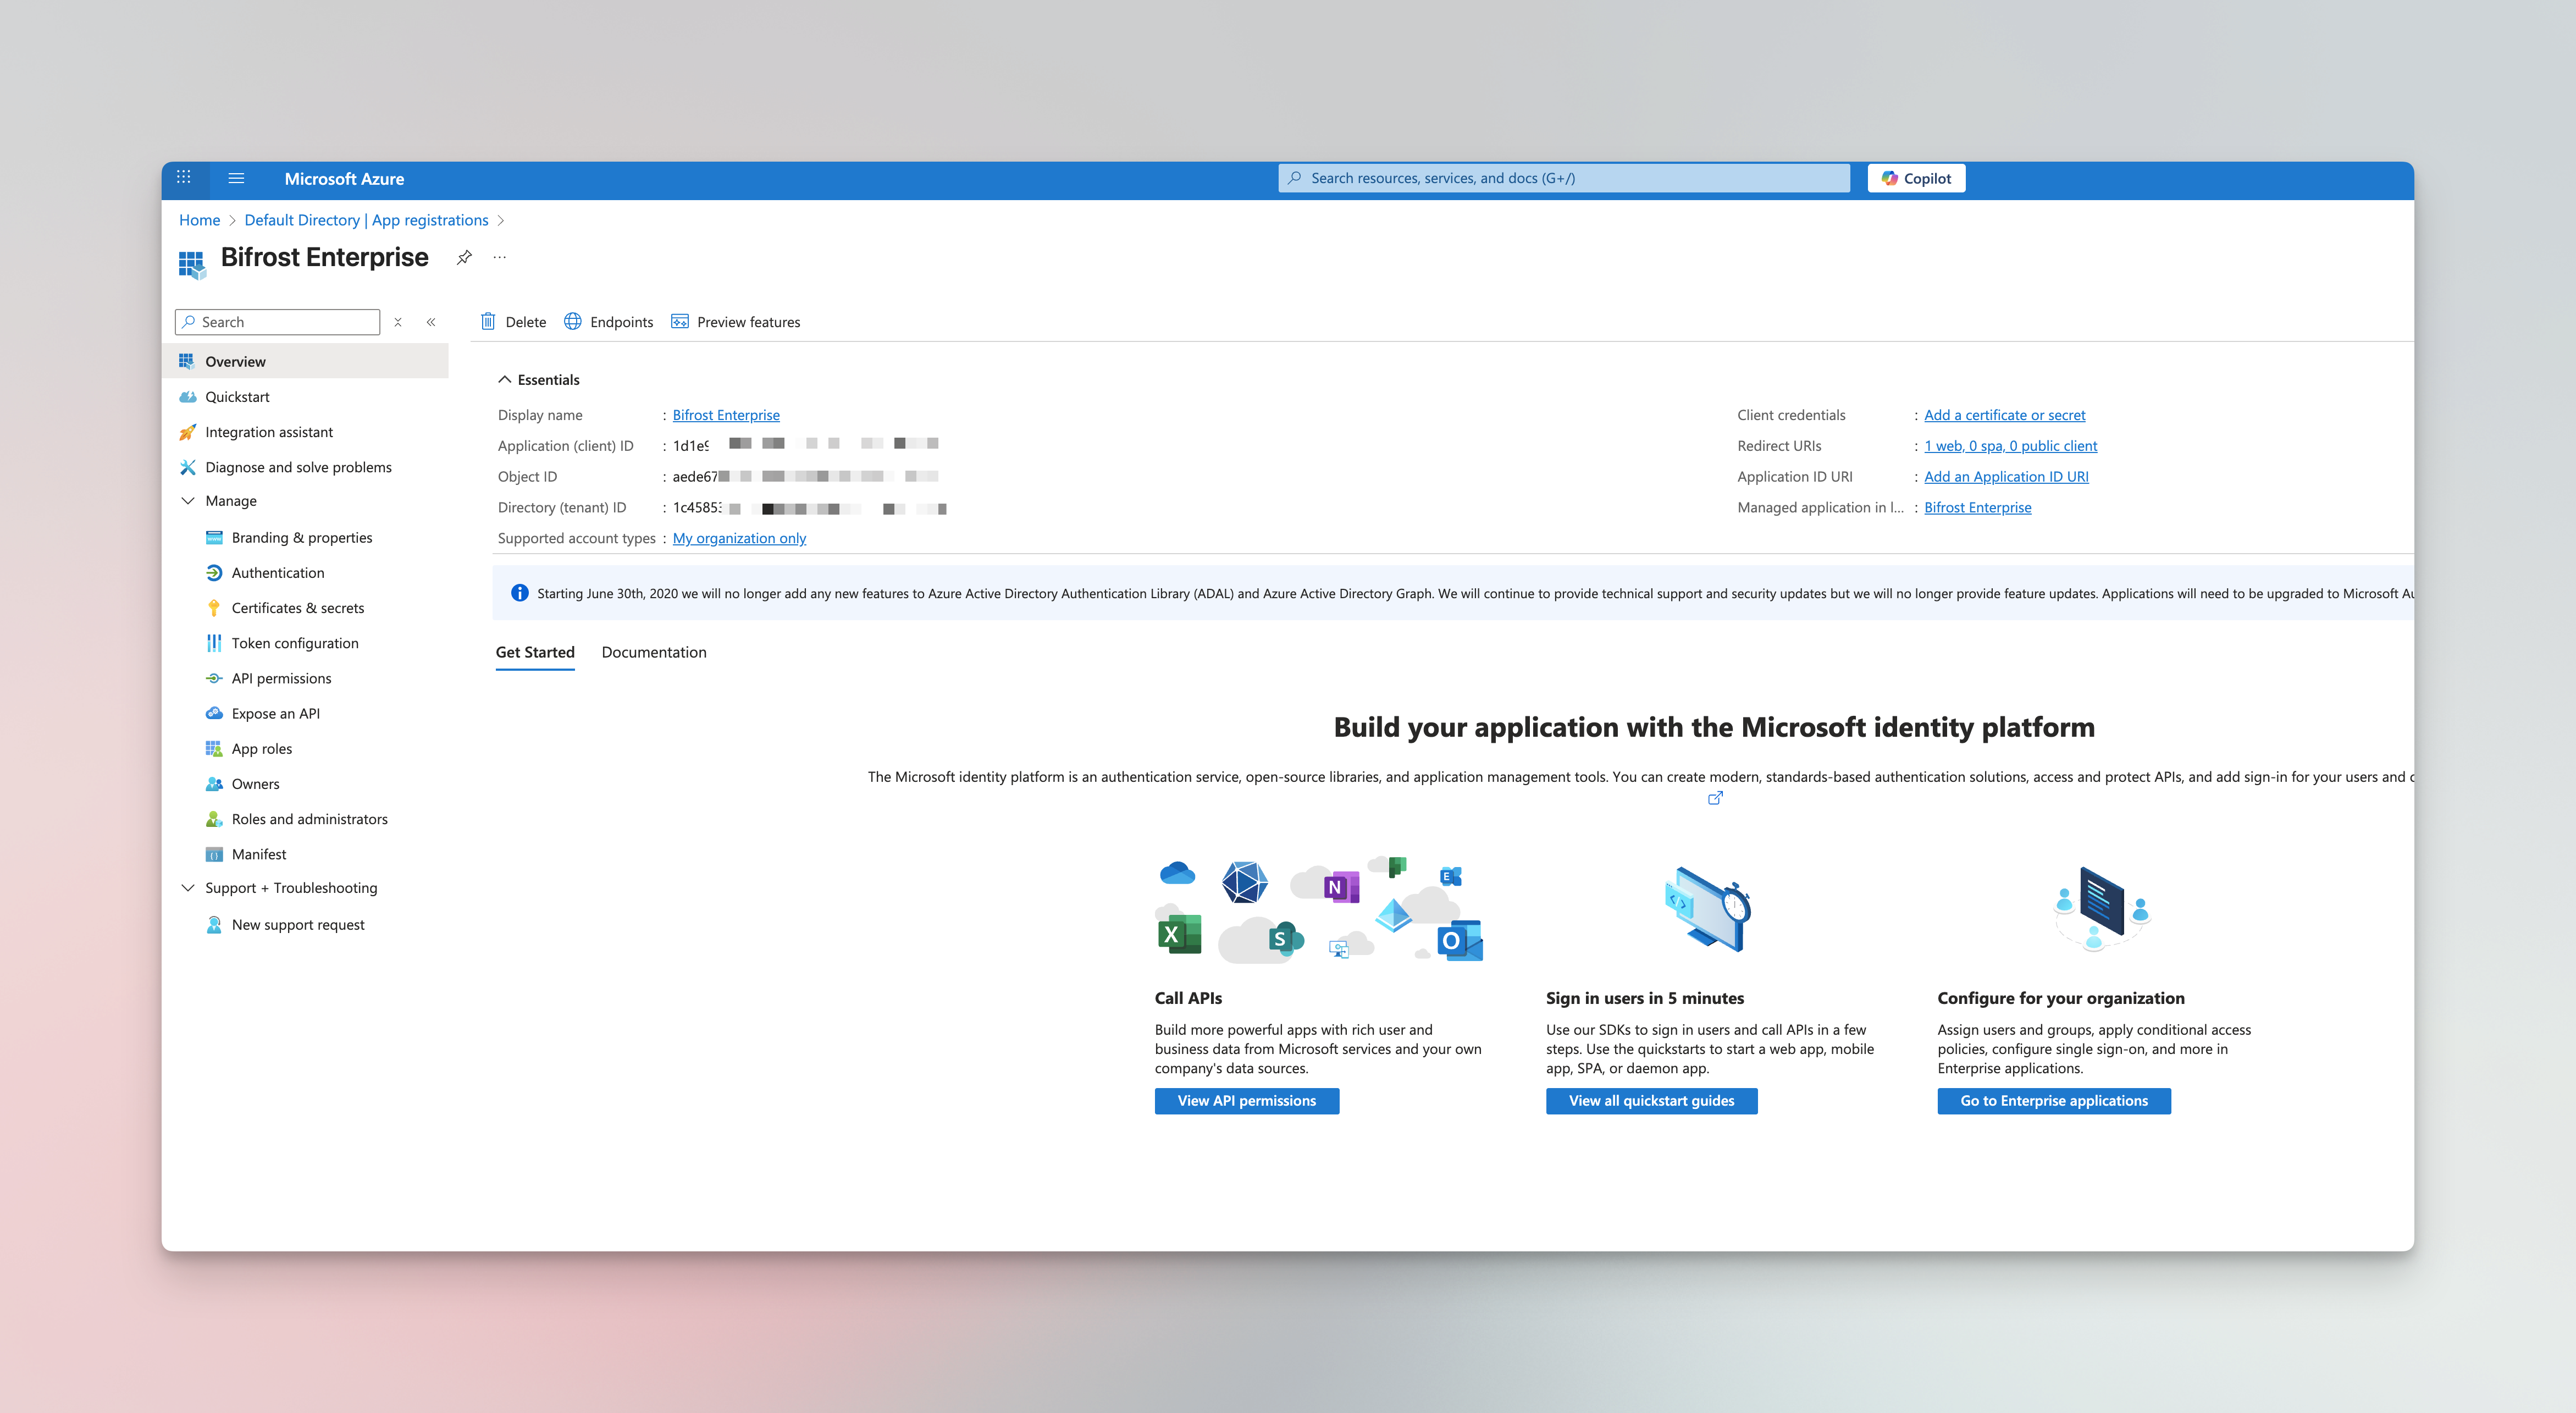
Step 1: Register an Application
Section titled “Step 1: Register an Application”- Sign in to the Azure Portal
- Navigate to Microsoft Entra ID (or Azure Active Directory)
- Go to App registrations
- Click New registration
Configure the registration:
| Field | Value |
|---|---|
| Name | DeepIntShield Enterprise |
| Supported account types | Accounts in this organizational directory only (Single tenant) |
| Redirect URI | Web: https://your-deepintshield-domain.com/login |
- Click Register
- After registration, note down the following from the Overview page:
| Value | Where to Find |
|---|---|
| Application (client) ID | Overview → Essentials |
| Directory (tenant) ID | Overview → Essentials |
Step 2: Create App Roles
Section titled “Step 2: Create App Roles”Configure roles in Entra that map to DeepIntShield’s role hierarchy (Admin, Developer, Viewer).
- In your app registration, go to App roles
- Click Create app role
- Create the following three roles:
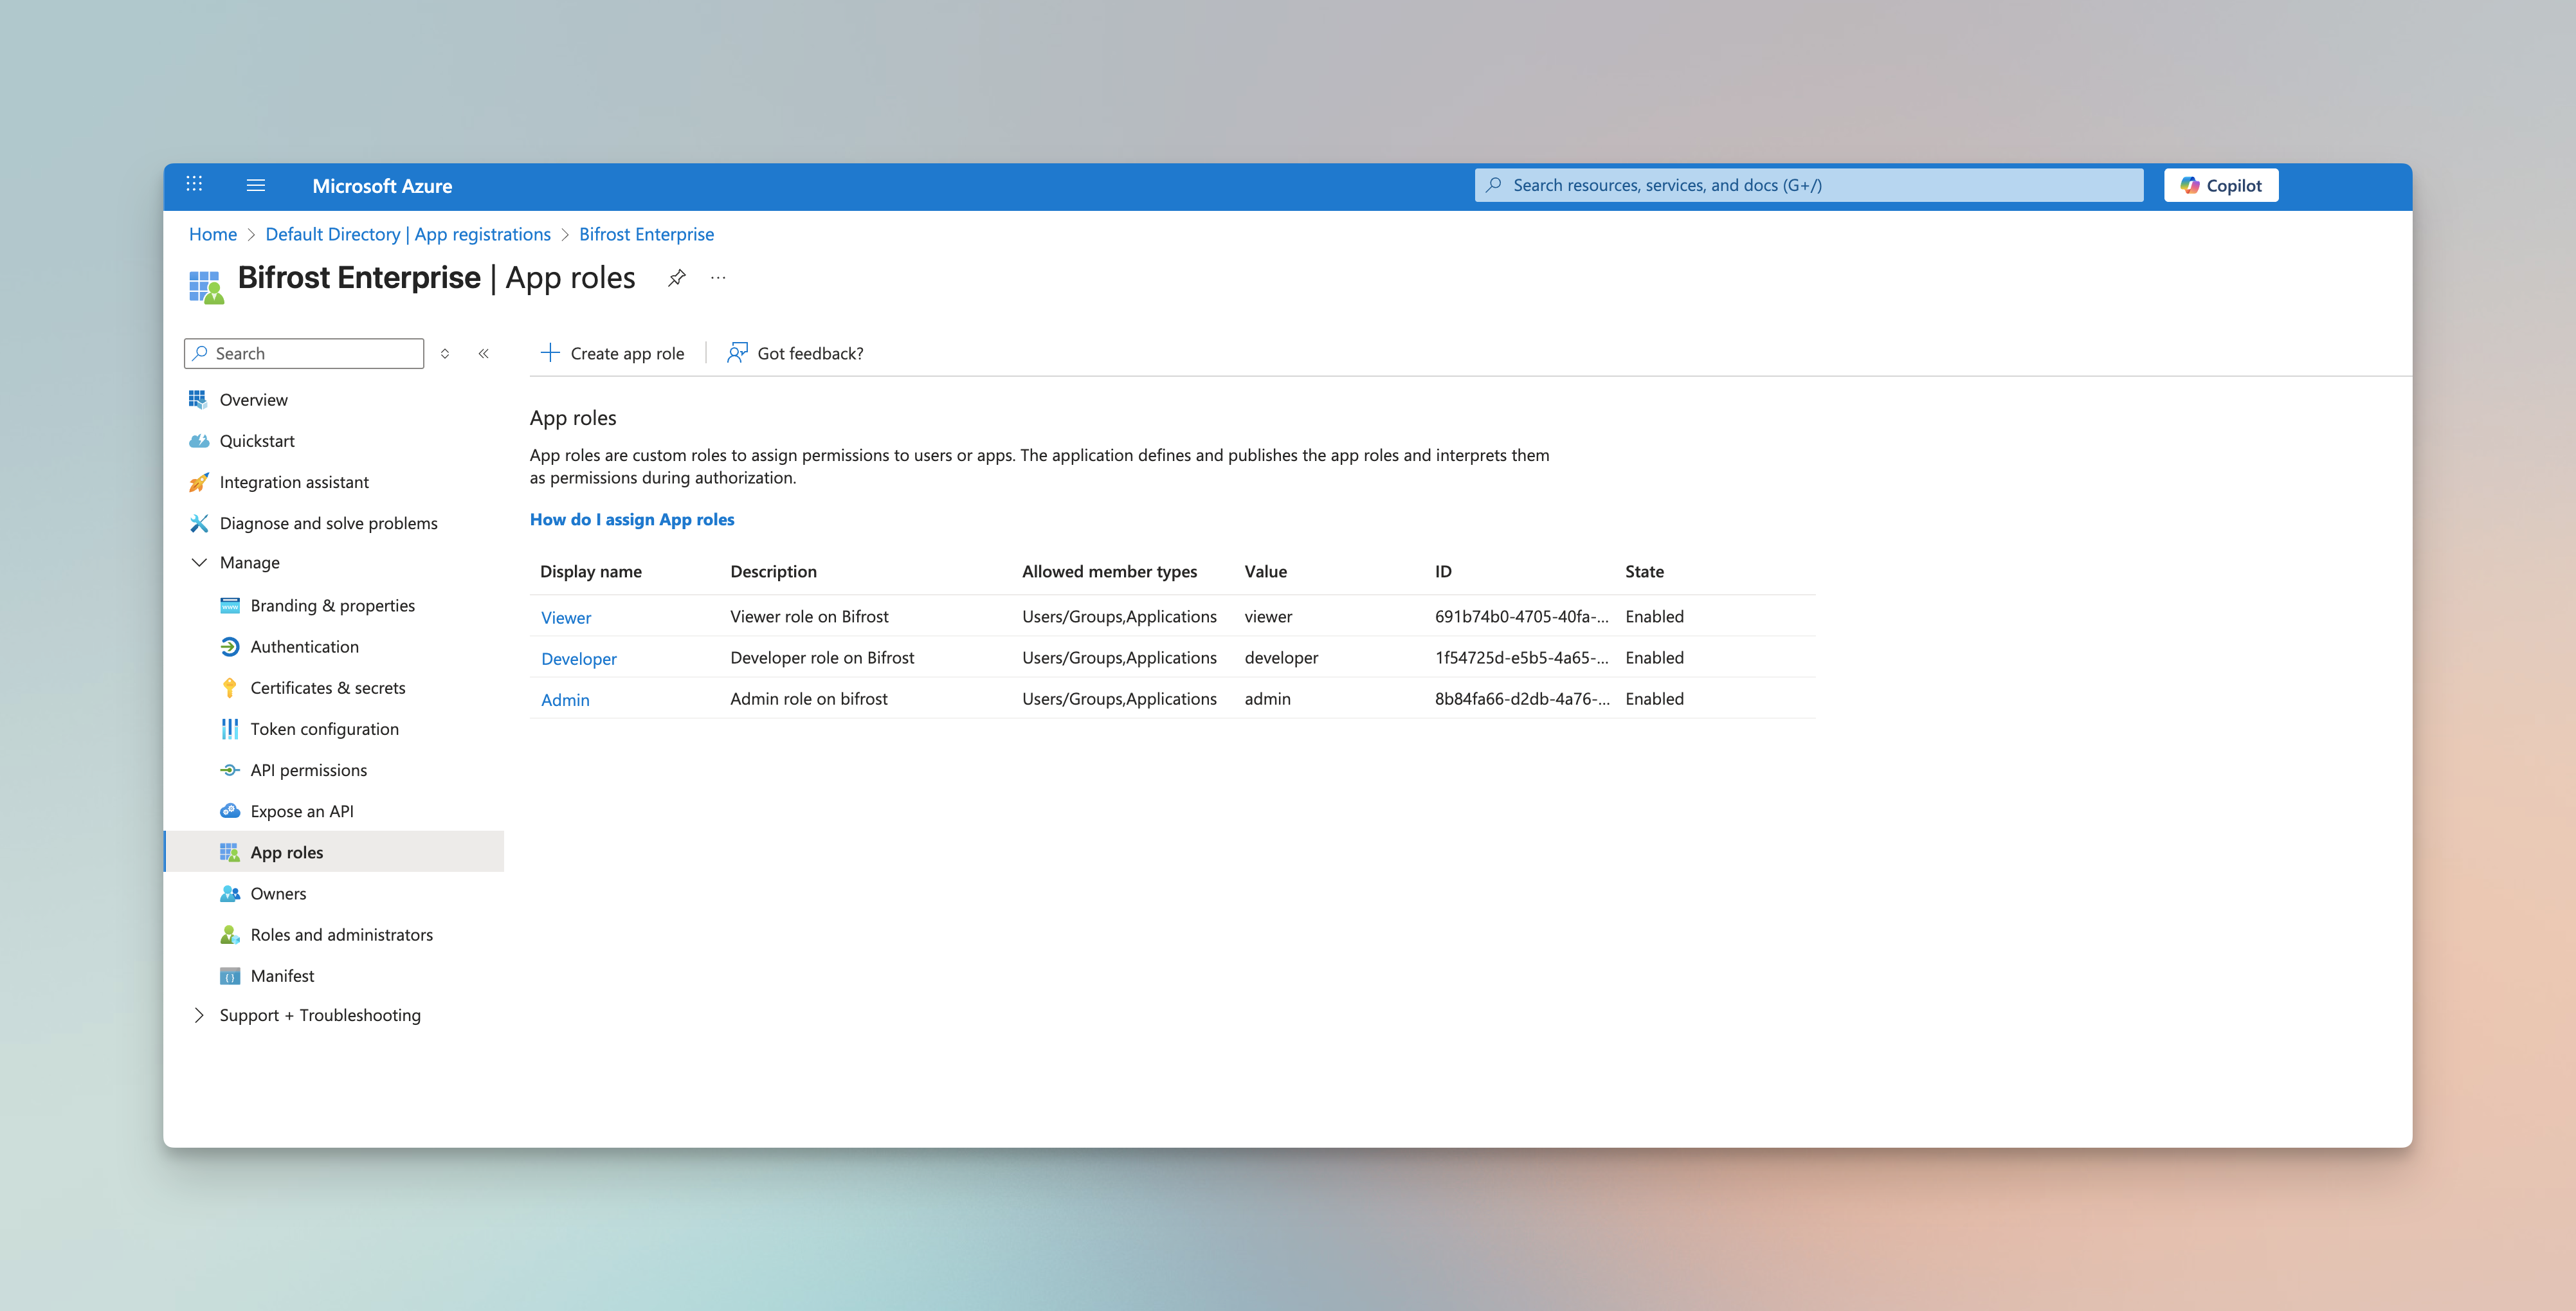
Viewer Role
Section titled “Viewer Role”| Field | Value |
|---|---|
| Display name | Viewer |
| Allowed member types | Users/Groups |
| Value | viewer |
| Description | Viewer role on DeepIntShield |
| State | Enabled |
Developer Role
Section titled “Developer Role”| Field | Value |
|---|---|
| Display name | Developer |
| Allowed member types | Users/Groups |
| Value | developer |
| Description | Developer role on DeepIntShield |
| State | Enabled |
Admin Role
Section titled “Admin Role”| Field | Value |
|---|---|
| Display name | Admin |
| Allowed member types | Users/Groups |
| Value | admin |
| Description | Admin role on DeepIntShield |
| State | Enabled |
Step 3: Enable Assignment Required
Section titled “Step 3: Enable Assignment Required”To control which users can access DeepIntShield, enable assignment requirement on the Enterprise Application.
- Go to Enterprise applications (from the main Entra ID menu)
- Find and select DeepIntShield Enterprise
- Go to Properties
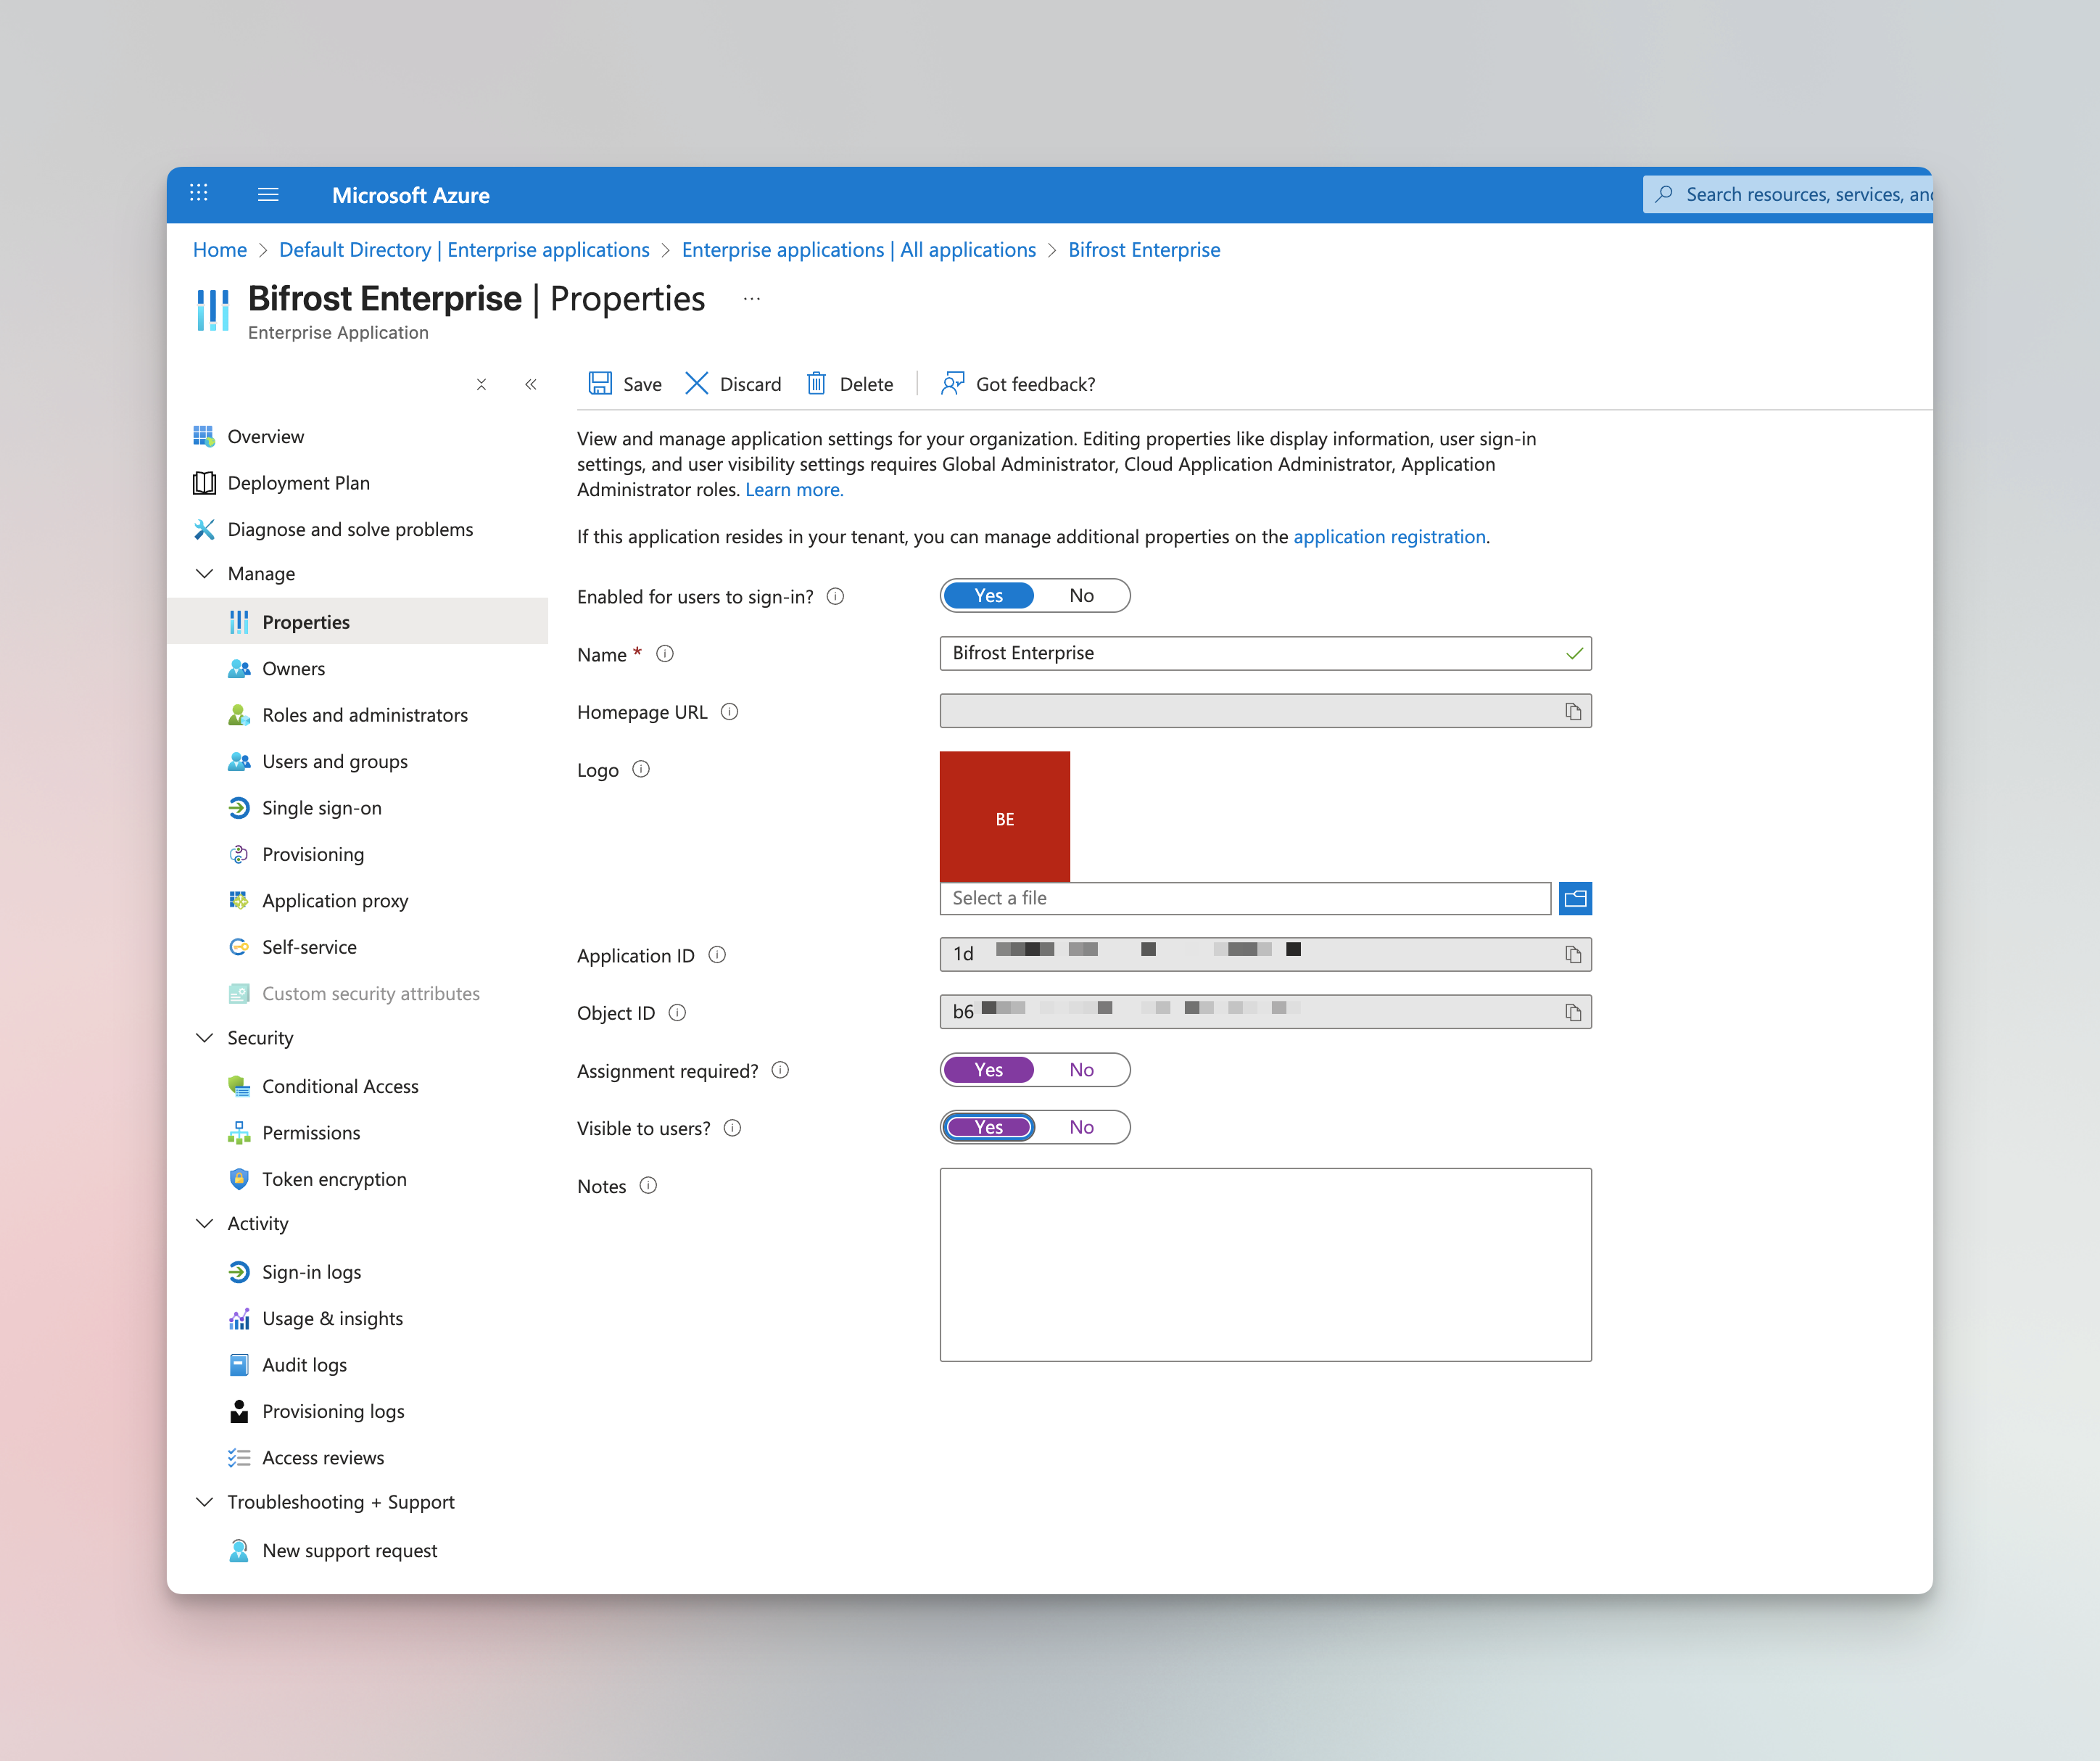
- Set Assignment required? to Yes
- Set Enabled for users to sign-in? to Yes
- Click Save
Step 4: Create a Client Secret
Section titled “Step 4: Create a Client Secret”DeepIntShield requires a client secret for OAuth authentication.
- Go back to App registrations → DeepIntShield Enterprise
- Navigate to Certificates & secrets
- Click New client secret
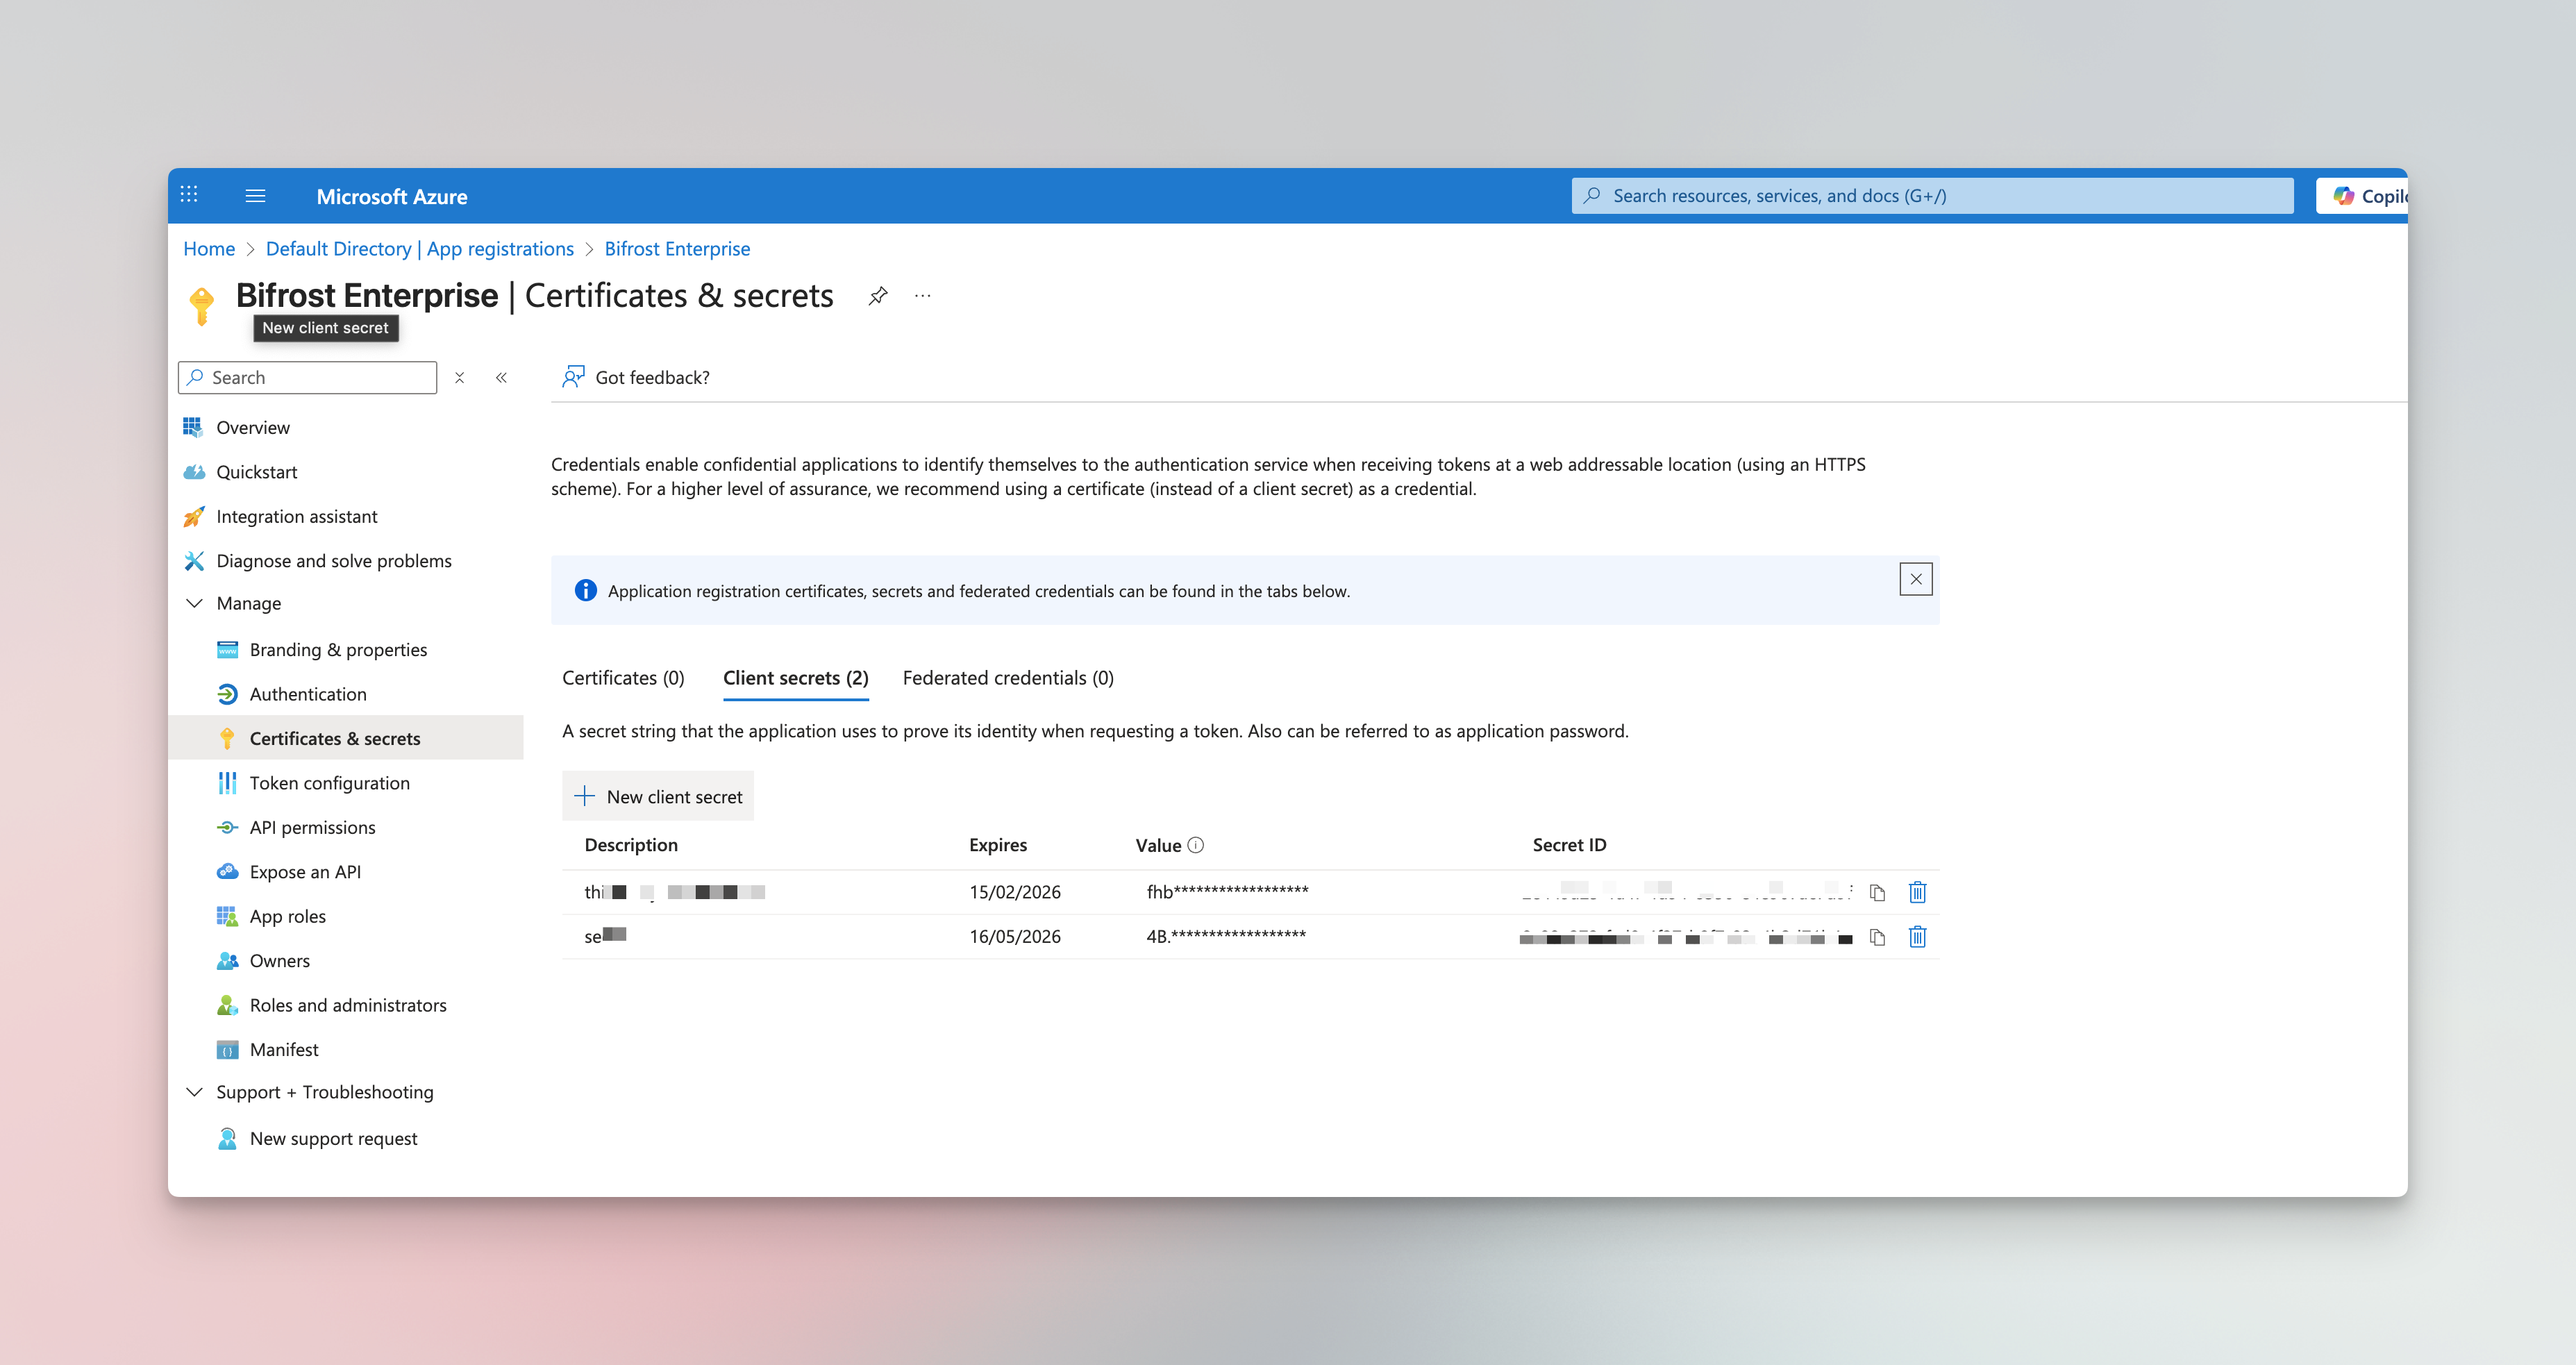
| Field | Value |
|---|---|
| Description | DeepIntShield Enterprise Secret |
| Expires | Choose based on your security policy (e.g., 24 months) |
- Click Add
- Copy the secret value immediately - it won’t be shown again!
Step 5: Configure API Permissions
Section titled “Step 5: Configure API Permissions”Ensure your application has the necessary permissions.
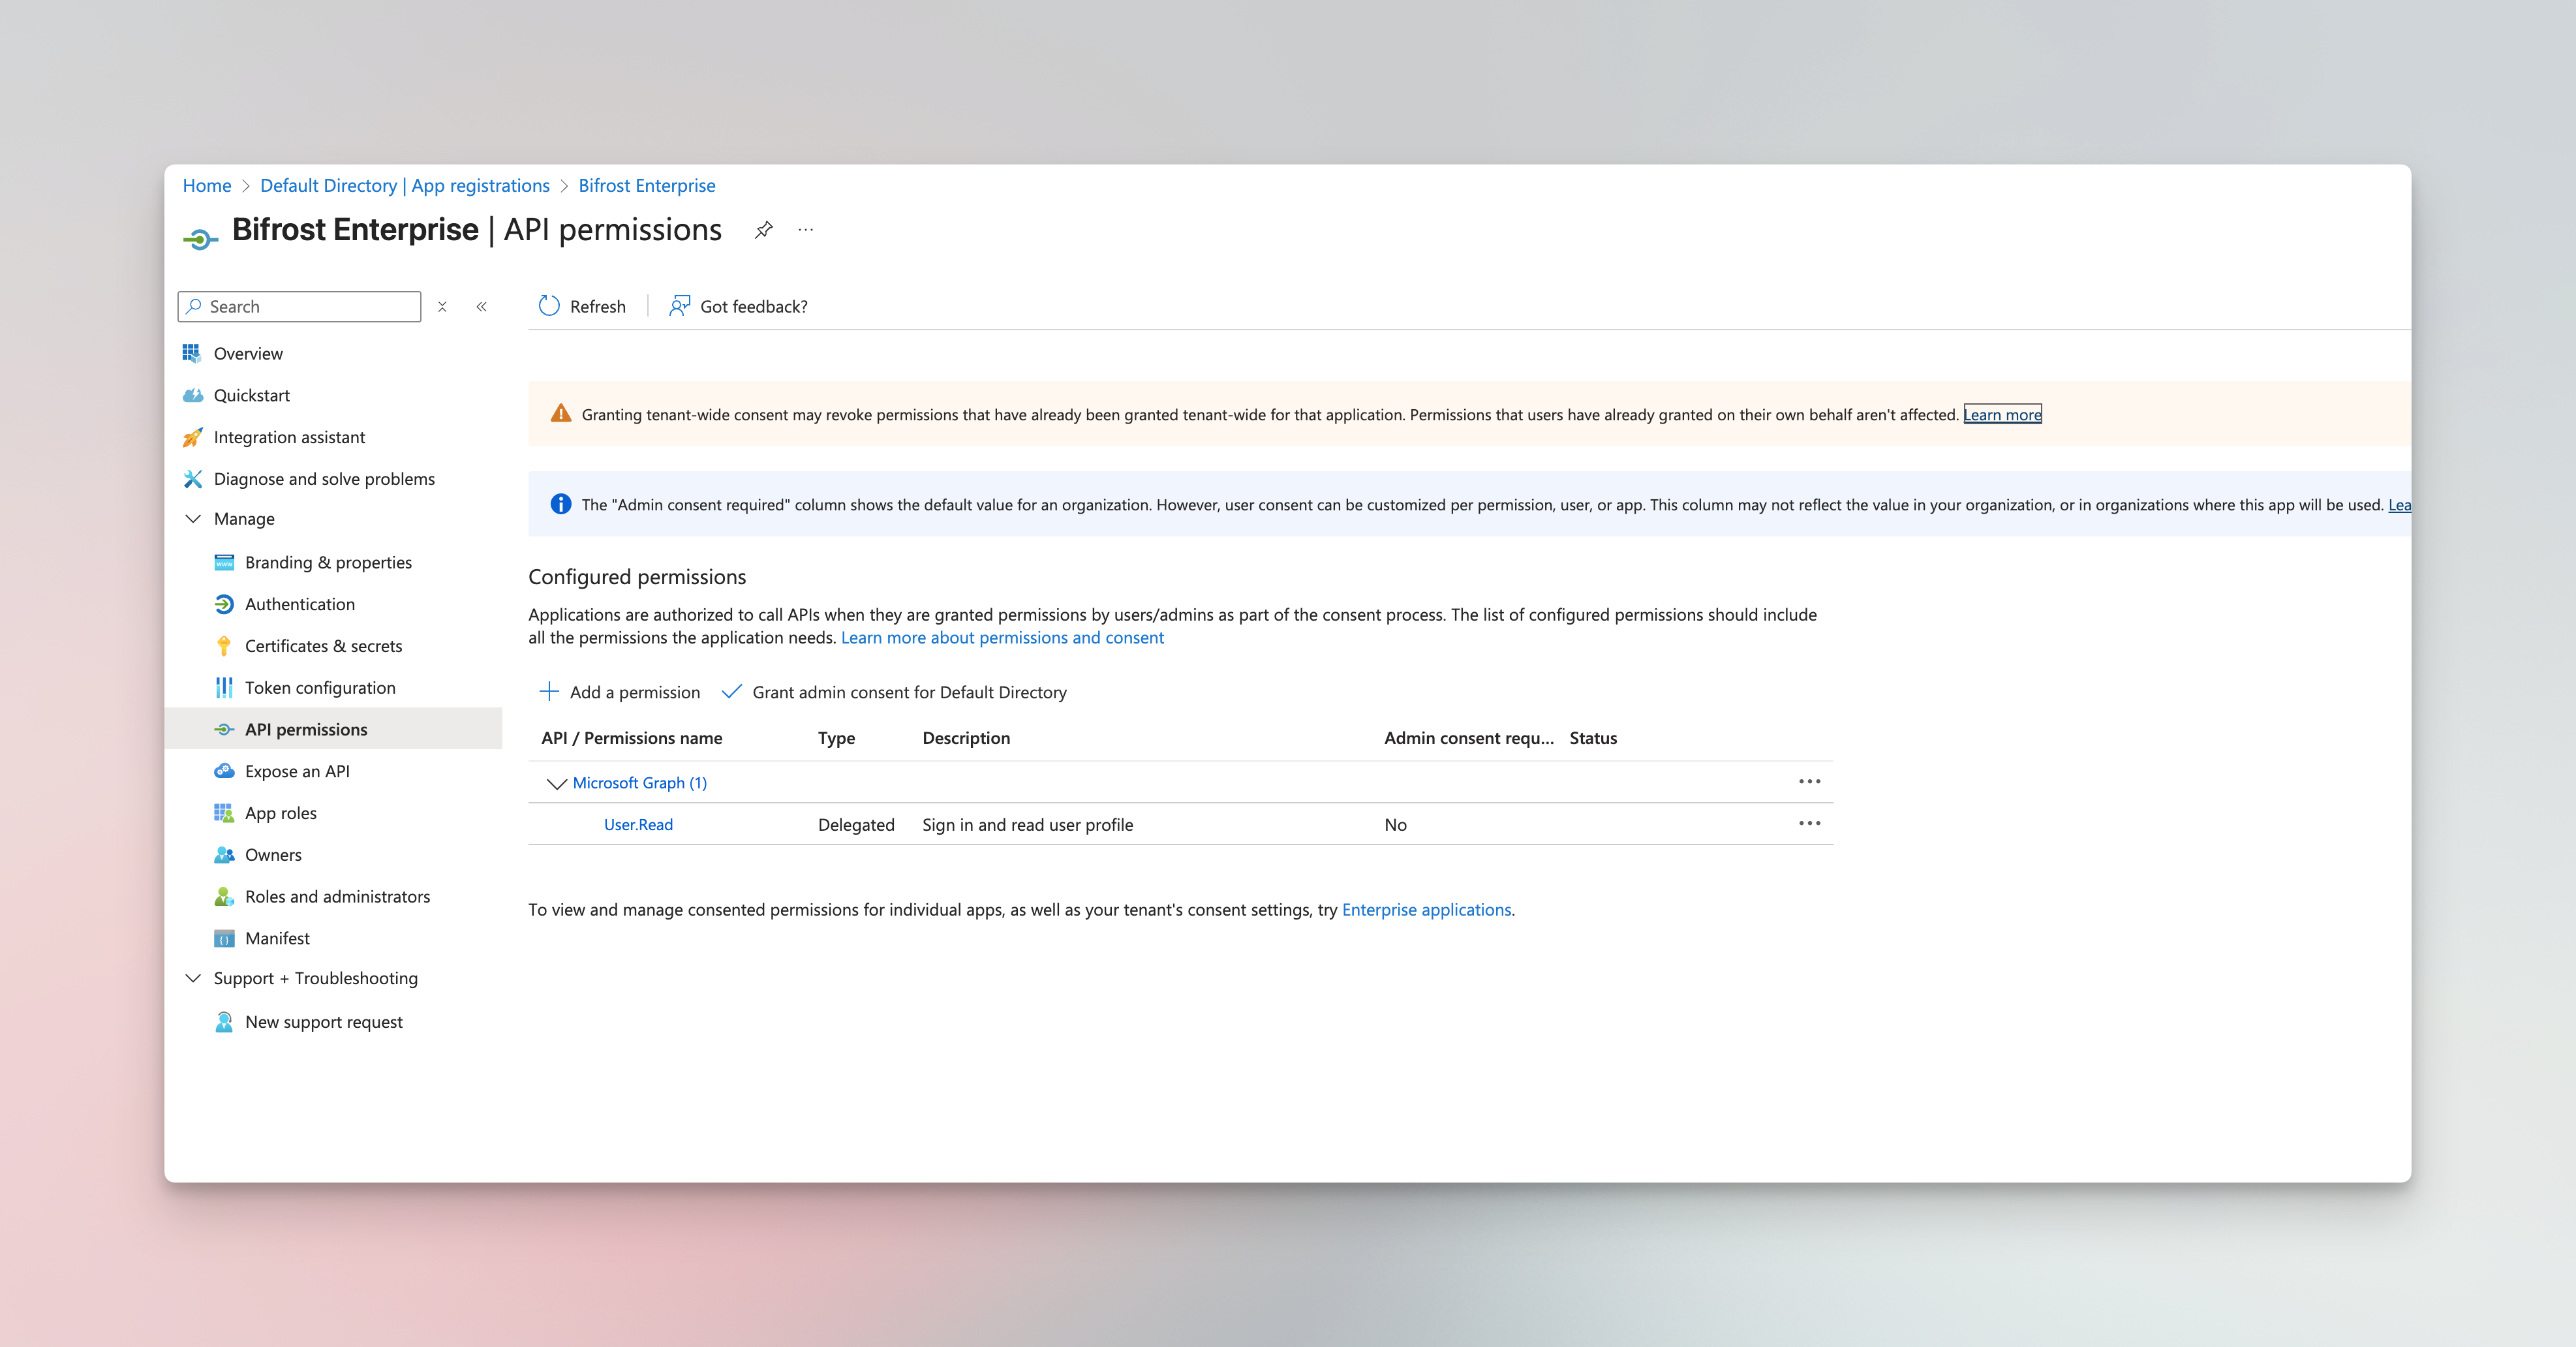
-
In your app registration, go to API permissions
-
Click Add a permission
-
Select Microsoft Graph
-
Choose Delegated permissions
-
Add the following permissions:
openidprofileemailoffline_access(for refresh tokens)
-
Click Add permissions
-
If required by your organization, click Grant admin consent for [Your Organization]
Step 6: Configure Token Claims (Optional)
Section titled “Step 6: Configure Token Claims (Optional)”By default, Entra includes the roles claim when app roles are assigned. To include group memberships for team synchronization:
- Go to Token configuration
- Click Add groups claim
- Select:
- Security groups or Groups assigned to the application
- For token type, enable ID and Access
- Click Add
Step 7: Assign Users and Roles
Section titled “Step 7: Assign Users and Roles”
- Go to Enterprise applications → DeepIntShield Enterprise
- Navigate to Users and groups
- Click Add user/group
- Select users or groups
- Select the appropriate role (Admin, Developer, or Viewer)
- Click Assign
Step 8: Configure DeepIntShield
Section titled “Step 8: Configure DeepIntShield”Now configure DeepIntShield to use Microsoft Entra as the identity provider.
Using the DeepIntShield UI
Section titled “Using the DeepIntShield UI”- Navigate to Governance → User Provisioning in your DeepIntShield dashboard
- Select Microsoft Entra as the SCIM Provider
- Enter the following configuration:
| Field | Value |
|---|---|
| Client ID | Application (client) ID from Azure |
| Tenant ID | Directory (tenant) ID from Azure |
| Client Secret | The secret you created in Step 4 |
| Audience | Your Client ID (optional, defaults to Client ID) |
| App ID URI | api://{client-id} (optional, for v1.0 tokens) |
- Toggle Enabled to activate the provider
- Click Save Configuration
Configuration Reference
Section titled “Configuration Reference”| Field | Required | Description |
|---|---|---|
tenantId | Yes | Azure Directory (tenant) ID |
clientId | Yes | Application (client) ID |
clientSecret | Yes | Client secret for OAuth authentication |
audience | No | JWT audience for validation (defaults to clientId) |
appIdUri | No | App ID URI for v1.0 tokens (e.g., api://{clientId}) |
userIdField | No | JWT claim for user ID (default: oid) |
rolesField | No | JWT claim for roles (default: roles) |
teamIdsField | No | JWT claim for group/team IDs (default: groups) |
Role Mapping
Section titled “Role Mapping”DeepIntShield automatically maps Entra app roles to its internal role hierarchy:
| Entra Role Value | DeepIntShield Role | Privilege Level |
|---|---|---|
admin | Admin | Highest |
developer | Developer | Medium |
viewer | Viewer | Lowest |
Multiple Roles: If a user has multiple roles assigned, DeepIntShield automatically selects the highest privilege role. For example, a user with both viewer and developer roles will be assigned the Developer role in DeepIntShield.
Default Role: Users without any assigned role will default to the Viewer role.
Testing the Integration
Section titled “Testing the Integration”- Open your DeepIntShield dashboard in a new browser or incognito window
- You should be redirected to Microsoft login
- Log in with an assigned user
- After successful authentication, you’ll be redirected back to DeepIntShield
- Verify the user appears in the DeepIntShield users list with the correct role
Troubleshooting
Section titled “Troubleshooting”User not redirected to Microsoft login
Section titled “User not redirected to Microsoft login”- Verify the SCIM provider is enabled in DeepIntShield
- Check that the DeepIntShield server was restarted after configuration
- Ensure the Tenant ID and Client ID are correct
”AADSTS50011: The reply URL does not match”
Section titled “”AADSTS50011: The reply URL does not match””- Verify the redirect URI in your app registration exactly matches your DeepIntShield login URL
- Ensure there are no trailing slashes or protocol mismatches (http vs https)
“AADSTS7000215: Invalid client secret”
Section titled ““AADSTS7000215: Invalid client secret””- Regenerate the client secret in Azure
- Ensure you’re using the secret Value, not the secret ID
- Check for any leading/trailing whitespace when copying
Roles not appearing in token
Section titled “Roles not appearing in token”- Ensure users are assigned to the Enterprise Application with a role
- Verify app roles are created with the correct lowercase values
- Check that “Assignment required” is enabled
”AADSTS70011: The provided request includes an invalid scope”
Section titled “”AADSTS70011: The provided request includes an invalid scope””- This usually happens when mixing
.defaultscope with other scopes - DeepIntShield handles this automatically - ensure you’re using the latest version
Groups not syncing as teams
Section titled “Groups not syncing as teams”- Verify the groups claim is configured in Token configuration
- Ensure users are members of the groups
- Check that groups are created and assigned in Entra
Token validation errors
Section titled “Token validation errors”- Ensure the Tenant ID matches your Azure directory
- Verify the Client ID is correct
- Check that the app registration is in the same tenant as your users
Next Steps
Section titled “Next Steps”- Advanced Governance - Learn about user budgets and compliance features
- Role-Based Access Control - Understand the Admin, Developer, Viewer hierarchy
- Audit Logs - Monitor user authentication and activity